Clip-In Extensions, Ponytail Extensions & Hair Toppers: Your DIY Styling Guide
Not ready for a full set of permanent extensions? You don't have to be. Clip-in extensions, ponytail extensions, and hair toppers are the DIY gateway to longer, fuller, more versatile hair — no salon appointment required to wear them. Whether you want extra volume for a night out on the Strip, a sleek ponytail for a Henderson brunch, or discreet coverage for a thinning crown, this guide covers everything you need to know to style them like a professional, right at home.
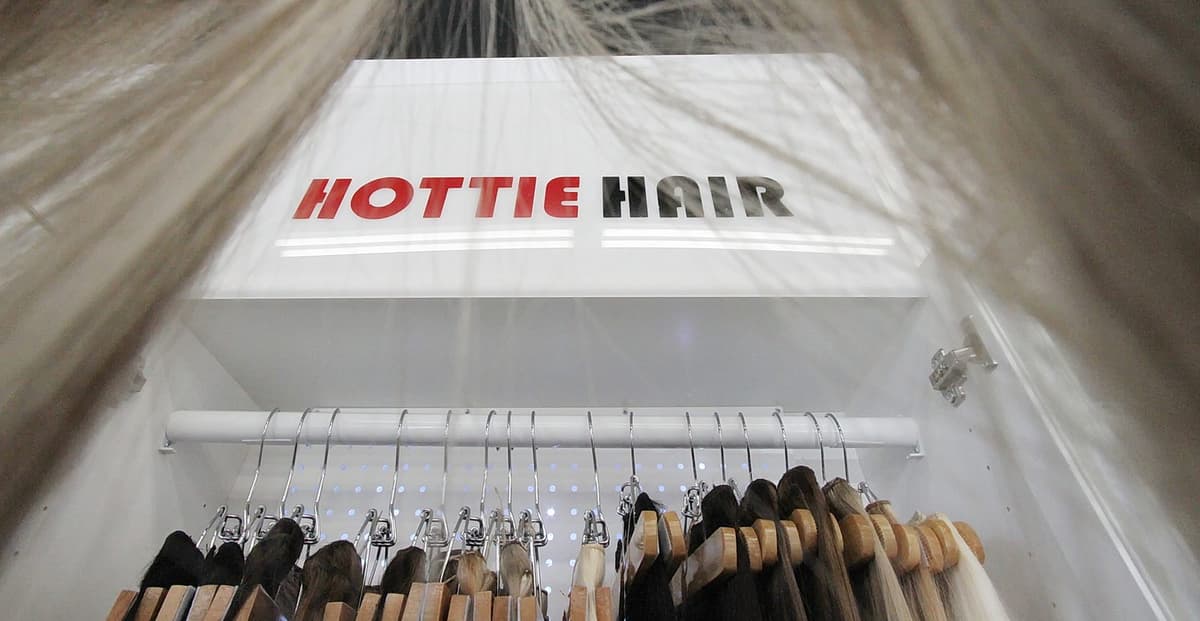
At Hottie Hair, we sell premium clip-ins, ponytails, and toppers in our online shop and across our three Las Vegas Valley locations. Our extension specialists fit and color-match hundreds of DIY pieces every year — so the advice in this guide comes directly from our stylists' hands-on experience, not generic internet tips. We keep $100K+ of premium hair in stock at all times, which means you can see, touch, and try on pieces before buying. No guessing, no ordering blind.
What's Inside This Guide
- Who Are DIY Extensions For?
- Clip-In Extensions: Complete Step-by-Step Guide
- Ponytail Extensions: Attachment & Styling Guide
- Hair Toppers: Coverage & Blending Guide
- Choosing the Right Color Match
- Care & Maintenance in Las Vegas Climate
- Clip-Ins vs. Ponytails vs. Toppers: Comparison Table
- When to Upgrade to Professional Extensions
- Frequently Asked Questions

Our extension wall at Hottie Hair Summerlin — browse and try on clip-ins, ponytails, and toppers in person before you buy
Who Are DIY Extensions For?
DIY extensions are the perfect entry point for anyone who wants the look of extensions without the commitment, cost, or maintenance schedule of professional installation methods like tape-ins or K-tips. They're ideal for:
- Extension beginners who want to test the waters before investing in permanent methods
- Event styling — weddings, date nights, photoshoots, Vegas nights out — when you want length or volume for one occasion
- Women with thinning hair who want daily coverage without adhesives or bonds (toppers especially)
- Busy professionals who need a polished look on demand but don't want regular maintenance appointments
- Color experimentation — try highlights, lowlights, or a completely different shade without chemicals
- Teens and young adults who want to play with their look without permanent commitment
- Women between extension appointments who need a bridge solution while their permanent set grows out
The three main types of DIY extensions each serve a different purpose. Clip-ins add all-over length and volume. Ponytail extensions create a single, dramatic ponytail look. Hair toppers target the crown area for women experiencing thinning or part widening. Let's break down each one.
Clip-In Extensions: Your Complete Step-by-Step Guide
Clip-in extensions are the most versatile DIY option. They consist of wefts of hair (usually 7-10 pieces per set) with small pressure-sensitive clips sewn along the top edge. You section your hair, snap the clips open, slide them in at the root, and snap them shut. The entire process takes 5-15 minutes once you've practiced a few times.
What You'll Need
- A full set of clip-in extensions (matched to your hair color and desired length)
- A rattail comb for clean sectioning
- A mirror (a two-mirror setup or bathroom vanity with side mirrors is ideal)
- Bobby pins (optional, for securing sections while you work)
- A flat iron or curling iron for blending (optional but recommended)
- Lightweight hairspray for hold
Step-by-Step Application
- Prep your natural hair. Start with clean, dry, fully detangled hair. If your hair is very silky or freshly washed, add a light texturizing spray or dry shampoo at the roots. This gives the clips something to grip — one of the most common reasons clip-ins slide out is starting with hair that's too smooth.
- Create your first section. Using a rattail comb, create a clean horizontal part about 1 inch above the nape of your neck. Clip the rest of your hair up and out of the way. This is where your first (widest) weft will go.
- Gently tease the root area. Take the rattail comb and lightly backcomb a thin line right along the part where the clips will sit. You don't need aggressive teasing — just enough texture to anchor the clips. This single step is the difference between clip-ins that last all day and ones that slip out by lunch.
- Attach the first weft. Open all the clips on your widest weft (usually the 4-clip piece). Starting from the center clip, snap it onto the backcombed section as close to the root as possible. Then snap the outer clips, working outward from center. The weft should sit flat against your head.
- Work your way up. Release another 1-1.5 inch section of hair. Repeat the backcomb-and-clip process with the next weft (usually a 3-clip piece). Continue moving up the head, alternating weft sizes. Most sets include: one 4-clip weft (back), two or three 3-clip wefts (mid-back and sides), two 2-clip wefts (temples), and one or two 1-clip wefts (near the part for volume).
- Leave enough natural hair on top. You need at least 2-3 inches of your own hair above the highest weft to cover the clips completely. This is the most important rule. If any clips are visible, you've placed too many wefts or gone too high.
- Blend and style. Let all your hair down. Gently comb or brush through the extensions and your natural hair together (starting from the ends, working up). Use a flat iron or curling iron to curl or wave both together — heat styling is the fastest way to make clip-ins look seamless. Finish with a light hairspray.

Premium clip-in wefts at Hottie Hair — our stylists can show you the exact placement technique during a free consultation
Common Clip-In Mistakes (and How to Fix Them)
Mistakes to Avoid
- Skipping the tease. Without root texture, clips will slide down within hours, especially in Las Vegas' dry air.
- Placing wefts too close together. Overcrowding creates a bumpy, unnatural profile. Leave 1-1.5 inches between wefts.
- Using the wrong weight. Too-thick clip-ins on fine hair create visible bulk lines. Choose a set matched to your hair density.
- Sleeping in clip-ins. Never do this. The clips pull on your roots and can cause tension headaches and breakage over time.
- Not curling or waving to blend. Straight clip-ins against straight natural hair tend to show a visible line where the weft ends. A few curls disguise everything.
Pro Tips from Our Stylists
- Layer your set. Don't use every weft every time. For a casual day, 3-4 wefts may be plenty. Save the full set for events.
- Cut for custom blending. Have a stylist layer and texturize your clip-ins to match your haircut. We do this at all three Hottie Hair locations.
- Flip the bottom weft. Flipping the nape weft upside-down before clipping creates more natural-looking volume at the bottom.
- Use a color-matched headband or scarf to disguise the top line on updos.
- Invest in quality. 100% Remy human hair clip-ins blend infinitely better than synthetic and last 1-2 years vs. a few months.
How to Remove Clip-In Extensions
Removal is simple: starting from the top wefts (reverse order of application), open each clip by pressing the center of the clip with your thumb and gently sliding the weft down and out. Never yank or pull. After removing all wefts, gently brush out any backcombing at the roots with a wide-tooth comb.
Want to Try Clip-Ins Before You Buy?
Visit any Hottie Hair location to see, touch, and try on clip-in sets. Our stylists will color-match you on the spot — no appointment needed for a quick browse.
Ponytail Extensions: Attachment & Styling Guide
A ponytail extension is a single hairpiece designed to wrap around your natural ponytail, instantly transforming a thin or short pony into a thick, flowing statement. They're the fastest DIY extension to apply — under 3 minutes once you've got the technique — and they're ideal for polished everyday looks, gym-to-dinner transitions, and Las Vegas events where you want high-impact style with minimal effort.
Types of Ponytail Extensions
- Wrap-around ponytails: The most common type. Features a built-in comb or clip at the top plus a long strand of hair that wraps around the base to conceal the attachment point. Natural-looking and secure.
- Claw clip ponytails: Attach with a large claw clip. Fastest to apply but can look bulky on fine hair. Best for casual looks.
- Drawstring ponytails: Use an internal drawstring to cinch around your natural pony. Very secure, popular for high ponytails and active lifestyles.
Step-by-Step: How to Attach a Wrap-Around Ponytail
- Create your base ponytail. Pull your natural hair into a ponytail at the height you want the extension to sit (high, mid, or low). Secure tightly with a sturdy elastic — not a thin one. This base is the anchor for everything, so make it tight. For extra security in Las Vegas heat (when you'll be sweating), use a bungee cord elastic rather than a standard band.
- Tuck and flatten. If your natural ponytail is short, wrap it into a small bun around the elastic and pin it flat. If it's longer, let it hang — the extension will cover it. The goal is a smooth, compact base.
- Attach the extension. Open the comb or clip at the top of the ponytail piece. Slide it into the hair directly above the elastic, pushing it firmly toward the scalp. The comb should anchor into the base of your ponytail.
- Wrap the concealer strand. Take the long strand of hair attached to the piece (the "wrap" strand) and wind it around the base of the ponytail, covering the elastic, the comb, and any visible attachment points. Wrap it tightly enough that it looks seamless but not so tight that it tugs. Secure the end with a bobby pin tucked underneath.
- Style and finish. Gently tug a few face-framing pieces loose from the front if you want a softer look. Use a flat iron to wave or curl the ponytail for texture, or leave it sleek and straight. A light hairspray at the base keeps flyaways down — essential in our desert wind.
Ponytail Styling Ideas
Sleek High Ponytail
Slick natural hair back with a gel or edge control, secure high on the crown, and attach the extension for a power pony. Perfect for Las Vegas nights out.
Soft Low Ponytail
Position the base at the nape, pull face-framing layers loose, and add soft waves to the extension. Elegant for weddings, dinner dates, or a day at the spa.
Bubble Ponytail
After attaching, add clear elastics every 3-4 inches down the length and gently pull each section to create "bubbles." A trendy, Instagram-ready look.
Wrapped Low Bun
Attach a long ponytail extension, then twist and wrap the entire length into a voluminous low bun. Secure with pins. Creates the illusion of incredibly thick hair.
Las Vegas Ponytail Tip
Vegas heat and dry desert wind are the enemies of a sleek ponytail. Before heading out, apply a strong-hold hairspray to your natural hair at the base and use edge control gel along your hairline. For outdoor events, carry two extra bobby pins in your clutch — the wind at venues like the Strip or Red Rock can loosen even a well-secured wrap. If you'll be near a pool, switch to a drawstring attachment for extra hold.
Hair Toppers: Coverage & Blending Guide
Hair toppers are the best-kept secret in the extension world. They're specifically designed for women experiencing crown thinning, part widening, or overall density loss — and unlike full wigs, they only cover the area that needs help. A good topper is virtually undetectable, blends with your natural hair, and gives you back the volume and confidence that thinning takes away.
If you've read our complete guide to hair thinning solutions, you know that toppers are one of the most effective non-surgical options for women dealing with visible scalp or thinning crowns. Here's how to choose and wear one.
Who Needs a Hair Topper?
- Women with thinning at the crown or along the part line
- Anyone experiencing widening parts where scalp is increasingly visible
- Women with overall density loss from hormonal changes, postpartum shedding, medications, or aging
- Those who've tried volumizing products and powders but want a more substantial solution
- Women who aren't candidates for bonded extensions due to hair fragility but still want coverage
- Anyone who wants the look of a full head of thick hair without committing to a wig
Topper Base Types
| Base Type | Best For | Realism | Breathability |
|---|---|---|---|
| Silk Top | Most natural scalp illusion | Excellent | Moderate |
| Lace Top | Lightweight daily wear | Very Good | Excellent |
| Mono Top | Versatile parting | Very Good | Good |
For Las Vegas specifically, we typically recommend lace top or mono top bases because of breathability. Silk tops look the most realistic, but in our summer heat (110+ degrees), the reduced airflow can make your scalp uncomfortable. Our stylists at Henderson and Summerlin can help you choose the right base for your lifestyle and level of thinning.

In-salon color matching ensures your topper blends seamlessly with your natural hair — available at all three Hottie Hair locations
How to Apply a Hair Topper: Step-by-Step
- Identify your coverage area. Stand in front of a mirror and look at where your thinning is most visible. The topper should be slightly larger than the thin area — you want your natural hair around the perimeter to blend over the edges of the base.
- Part your natural hair. Create a part that matches where you want the topper's part to fall. If your topper has a center part, part your natural hair at center. If it's a free part, choose your preference.
- Open the clips. Most toppers have 2-4 pressure clips along the base. Open all of them before positioning the piece.
- Position the front edge. Hold the topper by the front edge and place it where you want the front hairline of the piece to sit — usually about 1-2 inches behind your natural hairline. You want enough of your own hair in front to blend over the edge.
- Snap the front clips first. Press the front clips into your hair close to the scalp. Then smooth the piece backward and snap the back clips into place. The topper should lay flat against your head without any bumps or lifting.
- Blend your natural hair. Use your fingers or a rattail comb to pull your natural hair over the edges of the topper base. The goal is for your hair to flow seamlessly into the topper hair with no visible line of demarcation. If your natural hair is a slightly different texture, use a flat iron or curling iron to match the textures.
- Style together. Style the topper and your natural hair as one — curl, wave, straighten, or leave natural. The topper should move and behave like the rest of your hair.
Topper Blending Secret from Our Stylists
The number one thing that makes a topper look obvious is a mismatch in texture, not color. Even if the color is perfect, if the topper is pin-straight and your natural hair has a wave, it will look like two separate pieces. Always heat-style both your natural hair and the topper to match each other — this single step transforms a "wig-looking" piece into invisible coverage.
Struggling with Thinning Hair? Let Us Help You Find the Right Topper
Our extension specialists work with thinning hair every day. Come in for a private, no-pressure consultation — we'll assess your coverage needs and match you to the perfect piece.
Choosing the Right Color Match
Color matching is the single biggest factor in whether DIY extensions look natural or obviously fake. Get it right and nobody will know you're wearing extensions. Get it wrong and it doesn't matter how perfectly you placed them — the color mismatch will give you away instantly.
At-Home Color Matching Tips
- Match to your mid-lengths, not your roots. Your roots are typically darker than the rest of your hair. Extensions hang at mid-length and below, so they should match that zone — not the 1-2 inches closest to your scalp.
- Use natural daylight. Bathroom lighting is almost always warm or yellow-tinted, which distorts color perception. Compare extensions to your hair near a window with natural light, or step outside.
- Hold extensions inside your hair, not next to it. Laying a swatch on top of your hair looks different than tucking it inside where it will actually sit. Slide the extension piece between layers of your own hair to see how they blend.
- Consider multi-tonal sets. Very few people have a single, solid hair color. If you have balayage, highlights, or any dimension, look for extension sets that blend two or more tones rather than a single flat shade.
- When in doubt, go slightly darker. Extensions that are a half-shade too dark blend more naturally than ones that are too light. Light extensions on darker hair look stark and obvious; darker extensions create the illusion of depth and shadow.

The quality and color depth of premium Remy human hair extensions — available to see and feel in person at our shop
Why In-Salon Matching Is Worth It
Here's an honest truth from our stylists: at-home color matching from a screen is unreliable. Every monitor displays color differently, and lighting conditions vary wildly. We see clients weekly who ordered extensions online that looked perfect on their phone screen but are visibly off in person.
That's why we offer free in-salon color matching at all three locations — Henderson, Summerlin (West Charleston), and South Summerlin (Durango). Walk in, hold real hair next to yours in professional lighting, and leave with a perfect match. It takes 10 minutes, costs nothing, and eliminates the biggest risk in buying DIY extensions. We can also custom-color your extensions if you need a shade we don't carry out of the box.
Las Vegas Color Warning: Sun Fade
Nevada's intense UV exposure (index 10+ in summer) fades both natural hair and extensions faster than in most other climates. If your natural hair lightens significantly in summer, you may need to swap between two extension shades seasonally — a darker set for winter and a lighter one for summer. Our desert hair protection guide covers how to minimize UV fading for both natural hair and extensions.
Care & Maintenance for DIY Extensions in Las Vegas
DIY extensions don't require salon maintenance appointments like bonded methods, but they absolutely require care — especially in Nevada's climate. Proper maintenance is the difference between clip-ins that last 2 years and ones that look like straw after 3 months.
Washing Your DIY Extensions
- Frequency: Wash every 15-20 wears, or when product buildup is visible. Over-washing strips the hair and shortens lifespan dramatically.
- Method: Fill a sink or basin with lukewarm water and a small amount of sulfate-free shampoo. Submerge the extensions and gently swish — don't scrub, twist, or wring. Rinse thoroughly with cool water.
- Condition: Apply a lightweight conditioner from mid-length to ends. Leave on for 5-10 minutes, then rinse with cool water. For extra moisture (critical in our desert air), use a leave-in conditioner spray after washing.
- Drying: Lay flat on a clean towel and pat gently. Never hang wet extensions — the water weight stretches the wefts. Let them air dry completely before storing or wearing. In Las Vegas' dry air, extensions air-dry in about 2-3 hours.
Hard Water Alert for DIY Extensions
Las Vegas has the 2nd hardest water in the nation at approximately 550 PPM — that's 3x the EPA's "very hard" threshold. When you wash your extensions in Vegas tap water, mineral deposits coat the hair shaft, making it dull, brassy, and stiff. Two solutions: (1) use filtered water for extension washing (a simple Brita pitcher works), or (2) add a monthly chelating shampoo treatment to strip mineral buildup. Read our extension care guide for detailed hard water protocols.
Storing Your Extensions
- Always store dry. Never put damp extensions away — moisture breeds bacteria and creates a musty smell, even in dry Las Vegas.
- Detangle before storing. Brush extensions gently from ends to roots before putting them away. Tangles that sit for days become mats.
- Use a hanger, box, or bag. A dedicated extension hanger is ideal for clip-ins (keeps them tangle-free and aired out). Ponytails and toppers store well in a satin or silk-lined bag.
- Avoid heat and direct sunlight. Don't store extensions on a bathroom counter near windows. UV exposure fades color even when you're not wearing them. A dresser drawer or closet shelf is perfect.
- Keep away from dust. Las Vegas desert dust settles on everything. A closed container or bag prevents gritty buildup on your extensions between wears.
How Long Do DIY Extensions Last?
| Extension Type | Synthetic | Remy Human Hair | Virgin Human Hair |
|---|---|---|---|
| Clip-Ins | 1-3 months | 6-12 months | 1-2+ years |
| Ponytails | 1-3 months | 6-12 months | 1-2+ years |
| Hair Toppers | 2-4 months | 6-12 months | 1-3+ years |
These timelines assume proper care. In Las Vegas' climate, the main lifespan threats are UV fading, hard water mineral buildup, and dryness — not humidity or sweat like coastal cities. Protect against those three and your extensions will last at the upper end of these ranges.

Our salon-grade care products keep both natural hair and extensions healthy in Nevada's harsh desert climate — browse our full selection in the online shop
Ready to Shop Premium DIY Extensions?
$100K+ of premium hair in stock at all three Las Vegas locations
Skip the online guesswork. Visit our online shop to browse clip-ins, ponytails, and toppers, or stop by any location to see the hair in person, try it on, and get expert color matching from our stylists. No ordering, no shipping delays — walk out with your perfect piece the same day.
Clip-Ins vs. Ponytails vs. Toppers: Complete Comparison
Still deciding which DIY extension type is right for you? This side-by-side comparison breaks down everything — cost, use case, maintenance, and lifespan — so you can make the right investment.
| Feature | Clip-Ins | Ponytails | Toppers |
|---|---|---|---|
| Best For | All-over length & volume | Ponytail & updo looks | Crown thinning & part coverage |
| Application Time | 5-15 minutes | 2-3 minutes | 3-5 minutes |
| Skill Level | Beginner (some practice) | Very easy | Beginner to intermediate |
| Price Range (Human Hair) | $100 - $400+ | $60 - $250+ | $150 - $600+ |
| Lifespan (Human Hair) | 6 months - 2+ years | 6 months - 2+ years | 6 months - 3+ years |
| Heat Styling | Yes (human hair) | Yes (human hair) | Yes (human hair) |
| Salon Maintenance | None required (optional trim) | None required | None required (optional customization) |
| Wear Daily? | Occasional to daily (remove nightly) | Occasional (event or daily pony) | Daily wear (remove nightly) |
| Vegas Climate Rating | Excellent | Good (secure well in wind) | Excellent (lace base for breathability) |
| Can Be Colored? | Yes (darker only, professionally) | Yes (darker only, professionally) | Yes (darker only, professionally) |
For a broader comparison that includes professional methods like tape-ins, K-tips, and hand-tied wefts alongside these DIY options, read our complete guide to choosing the right extension method. And for a full pricing breakdown across all types, check our extension pricing guide.
When to Upgrade to Professional Extensions
DIY extensions are fantastic — but they have limitations. If you find yourself in any of these situations, it might be time to consider professional, semi-permanent extensions that stay in 24/7:
Signs You're Ready to Upgrade
- You wear clip-ins every single day. Daily application and removal adds up to hours each week. Professional extensions eliminate that routine entirely.
- You want to swim, sleep, and work out without removing them. DIY pieces need to come out before water, sleep, and intense activity. Professional methods stay put through all of it.
- You're tired of visible clips or attachment points. Even well-placed clip-ins can show if your hair shifts. Bonded, taped, or sewn-in extensions are invisible 100% of the time.
- You need more volume than clips can hold. Clip-ins are limited by how many wefts your natural hair can support. Professional methods can add significantly more hair.
- Your thinning has progressed beyond what a topper covers. If you need full-coverage solutions, a professional consultation can identify hand-tied weft or beaded weft options that provide more density.
Professional Methods to Consider
- Tape-In Extensions: Fastest professional install (60-90 min), great for beginners, 6-8 week maintenance. Our most popular upgrade from clip-ins.
- K-Tip Keratin Fusion: Individual strand bonds, lasts 3-4 months, most natural movement. Ideal for women who want the ultimate "it's all my hair" look.
- Hand-Tied Weft: Maximum volume with a flat, comfortable fit. Perfect for thick-hair lovers who want show-stopping fullness.
- Beaded Weft: No heat, no glue — attached with tiny beads and a thread. Gentle on fine hair and easy to maintain.

The volume and length possible with professional extensions — many clients start with DIY and upgrade once they fall in love with longer hair
The transition from DIY to professional is seamless. Many of our clients at Henderson, Summerlin, and South Summerlin started with clip-ins from our shop, fell in love with the look of longer hair, and upgraded to tape-ins or K-tips within a few months. Your free consultation is the perfect time to explore what professional method would work best for your hair type, lifestyle, and budget.
Frequently Asked Questions
Can I sleep in clip-in extensions?
No — always remove clip-ins before bed. The clips create tension on your roots while you sleep, which can cause headaches, breakage, and thinning over time. The metal clips can also snag and tangle. Remove, detangle, and store your clip-ins nightly. If you want extensions you can sleep in, consider tape-in extensions or another professional method.
Do clip-in extensions damage your natural hair?
When worn correctly (not too tight, removed nightly, not worn during sleep), clip-ins cause minimal to zero damage. The key is not wearing them in the same exact spot every single day — rotate placement slightly to avoid tension alopecia. If you're wearing them daily, that's a sign you might benefit from professional extensions that distribute weight more evenly.
How do I match extensions to highlighted or balayage hair?
Multi-tonal hair is the hardest to match from a screen. Look for extension sets specifically designed for highlighted or balayage looks (they'll blend two or three shades). Better yet, bring a photo of your hair to any Hottie Hair location and our stylists will match you in person using our physical color ring. We can also custom-tone or highlight extensions to match your exact color blend.
Can I wear a ponytail extension to work out?
Yes, with caveats. A drawstring ponytail is the most secure option for workouts. Wrap-around ponytails can loosen with vigorous movement (spinning, running). For gym sessions in Las Vegas heat, use a sweatband at the base to absorb moisture and keep the attachment dry. Wash the ponytail piece monthly if you wear it during workouts regularly.
How do I know if a topper is big enough for my thinning area?
Measure the area of thinning: length (front to back) and width (side to side). Your topper base should be at least 1 inch larger than the thin area in all directions so your natural hair can overlap and blend over the edges. If you're unsure, our extension specialists can assess your coverage area during a free consultation and recommend the right base size.
Can I use hot tools on DIY extensions?
Yes — if they're 100% human hair. Synthetic extensions will melt or frizz irreversibly when exposed to heat. For human hair extensions, keep your flat iron or curling iron below 350 degrees Fahrenheit and always use a heat protectant spray. Our Las Vegas climate already stresses hair, so minimizing unnecessary heat exposure helps your investment last longer.
How does Las Vegas hard water affect DIY extensions?
Las Vegas water is approximately 550 PPM (among the hardest in the US). Mineral deposits coat extension hair just like natural hair, causing dullness, brassiness, and dryness. Wash DIY extensions with filtered water when possible, and use a chelating shampoo once a month. The good news: since DIY extensions come off, you can soak them in a vinegar-water solution to strip buildup — something you can't easily do with bonded extensions.
What's the difference between synthetic and human hair extensions?
Human hair extensions can be heat-styled, colored, washed, and treated like your own hair. They blend naturally, last significantly longer (1-2+ years vs. 1-3 months), and feel indistinguishable from real hair. Synthetic extensions are cheaper upfront but can't handle heat, have an artificial shine, and wear out quickly. We carry only premium 100% Remy human hair at Hottie Hair because the quality difference is dramatic — come feel the difference in person at our shop.
Related Guides & Resources
- Choosing the Right Hair Extension Method — Compare DIY and professional methods side by side
- Hair Extension Cost & Pricing Guide — Full pricing breakdown for every extension type
- Hair Thinning & Volume Solutions — Complete guide to solutions for thinning hair, including toppers and professional extensions
- Tape-In Extension Care Guide — If you're considering upgrading to tape-ins, start here
- Protecting Hair from Nevada Heat & Dryness — Desert climate protection for natural hair and extensions
Find Your Perfect DIY Extensions at Hottie Hair
Browse clip-ins, ponytails, and toppers in person at any of our three Las Vegas locations. See the hair, feel the quality, get color-matched by an expert — all before you buy. No appointment needed to browse, or book a free consultation for a full assessment.
(702) 979-4468 | Mon-Sat 10AM-7PM
Related Articles
Continue reading about extensions

Learn why professional extension removal matters and what to expect during your appointment. Complete guide to safe removal, aftercare, and reapplication timing from our Henderson and Summerlin specialists.

Nervous about getting extensions for the first time? This guide walks you through every step — from consultation to installation day to your first month — so you know exactly what to expect.

Compare different extension methods and find the perfect match for your daily routine, hair type, and Nevada lifestyle from our Henderson and Summerlin experts.