Balayage vs. Highlights: Complete Las Vegas Guide 2025
Discover the differences between balayage and traditional highlights in Las Vegas. Expert advice from Henderson and Summerlin colorists on which technique is right for Nevada's climate.

Choosing between balayage and traditional highlights is one of the most common questions we hear at our Henderson and Summerlin salons. Both techniques create beautiful dimension, but they offer very different results - especially when you factor in Las Vegas' unique climate and lifestyle.
Understanding the Techniques
Before diving into which is better for Las Vegas living, let's break down exactly what each technique involves. For more color education, visit our Color Education Hub.
What is Balayage?
Technique: French for "to sweep," balayage is a freehand painting technique where color is applied by hand to create natural-looking highlights.
The Process:
- Our Henderson and Summerlin colorists hand-paint lightener onto your hair
- No foils are used (or minimal foils for extra lift)
- Color is concentrated on the surface, getting lighter toward the ends
- Creates a sun-kissed, natural gradient effect
- Takes 2-4 hours depending on hair length and desired lightness
Best For:
- Natural, lived-in looks
- Low-maintenance color
- Brunettes wanting subtle dimension
- Those growing out previous highlights
- Busy Las Vegas lifestyles (less frequent touch-ups)
Real Client Transformation: Balayage Highlights

Before

After
Blonde bombshell transformation with balayage by Niko Hernandez — view more transformations
What are Traditional Highlights?
Technique: Sections of hair are woven or sliced and wrapped in foils with lightener for a more dramatic, structured result.
The Process:
- Hair is sectioned precisely throughout the head
- Small sections are woven and placed in foils
- Foils allow for maximum lift and even color distribution
- Can achieve very light blonde from darker bases
- Takes 2-3 hours for full foil application
Best For:
- Dramatic color transformation
- All-over brightness
- Going very blonde from dark hair
- Precise, uniform color placement
- Vegas glam and special events
Side-by-Side Comparison
| Feature | Balayage | Traditional Highlights |
|---|---|---|
| Application Method | Hand-painted, freehand | Foils, precise sectioning |
| Time Required | 2-4 hours | 2-3 hours |
| Cost Range (Vegas) | $250-$400 | $200-$350 |
| Maintenance Frequency | Every 3-4 months | Every 6-8 weeks |
| Grow-Out Look | Seamless, natural | More noticeable roots |
| Best for Vegas Sun | Excellent - less harsh lines | Good - may lighten faster |
| Drama Level | Subtle to medium | Medium to dramatic |
| Customization | Highly customizable | Structured, predictable |
Las Vegas Climate Considerations
Nevada's intense sun and dry air affect color differently than in humid climates. Here's how each technique holds up:
Balayage in Las Vegas Climate
✅ Advantages:
- Natural Fading: As color lightens from Nevada sun, it looks intentionally sun-kissed rather than grown out
- Less Maintenance: Perfect for busy Vegas lifestyles - you can go 3-4 months between appointments
- Forgiving Grow-Out: The painted technique means no harsh lines as hair grows
- UV Resistance: Blended color hides sun-fading better than precise highlights
- Pool-Friendly: Chlorine damage is less noticeable with the natural variation
⚠️ Considerations:
- May require toner refreshes every 6-8 weeks to combat brassy tones from Vegas sun
- UV protectant spray is essential to maintain tone
- Deep conditioning treatments recommended monthly in dry climate
Traditional Highlights in Las Vegas Climate
✅ Advantages:
- Dramatic Impact: Perfect for Vegas glam and special events
- Maximum Brightness: Foils allow for lighter lift - great for going very blonde
- Even Results: Consistent color throughout
- Precise Control: Easier to match previous color exactly
⚠️ Considerations:
- Requires more frequent touch-ups (6-8 weeks) as roots show more obviously
- Nevada sun can create more noticeable brassiness due to uniform color
- Hard water in Las Vegas can cause more mineral buildup on lighter highlights
- May need more toning appointments to combat desert sun effects
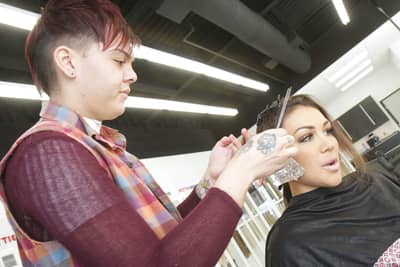
Which Should You Choose?

Traditional foil highlights application at our Summerlin salon
🎨 Choose Balayage If You:
- Want a natural, "I woke up like this" look
- Have a busy schedule and want low-maintenance color
- Are new to color and want to start subtle
- Spend lots of time outdoors in Vegas sun
- Want to grow out your color gracefully
- Are growing out previous highlights
- Have brunette to medium brown hair
- Want to avoid frequent salon visits
✨ Choose Traditional Highlights If You:
- Want maximum drama and transformation
- Need very light blonde from dark hair
- Love the high-maintenance Vegas glam look
- Have an important event (wedding, show, photoshoot)
- Want all-over brightness and dimension
- Prefer precise, uniform color
- Don't mind frequent touch-ups
- Want to cover significant gray hair
Can You Combine Both Techniques?
Absolutely! Many of our Henderson and Summerlin clients get the best of both worlds with a hybrid approach:
The "Foilayage" Technique
This popular hybrid method combines the brightness of foil highlights with the soft blending of balayage. It's especially effective for Las Vegas clients who want:
- Maximum Lift: Foils near the face and crown for brightness
- Natural Blending: Hand-painted balayage throughout the rest
- Best of Both: Drama where you want it, natural where you need it
- Vegas Perfect: Glam for events, low-maintenance for daily life
Maintenance in Las Vegas
Essential Products for Nevada Climate
Regardless of which technique you choose, maintaining color in Las Vegas requires:
Daily Care:
- Purple/blue toning shampoo (2-3x per week)
- UV protectant spray
- Leave-in conditioner with SPF
- Sulfate-free color-safe shampoo
Weekly Treatments:
- Deep conditioning mask
- Clarifying shampoo (removes Vegas hard water buildup)
- Bond-building treatment
- Hair oil for dry ends
Visit our Henderson or Summerlin salons to get personalized product recommendations for your specific color and Nevada's climate.
Salon Maintenance Schedule
| Service | Balayage | Highlights |
|---|---|---|
| Color Touch-Up | Every 3-4 months | Every 6-8 weeks |
| Toner Refresh | Every 6-8 weeks (optional) | Every 4-6 weeks (recommended) |
| Deep Treatment | Every 4-6 weeks | Every 4 weeks |
| Trim | Every 8-12 weeks | Every 6-8 weeks |
Cost Breakdown: Las Vegas Pricing
At our Henderson and Summerlin locations, here's what you can expect to invest:
🎨 Balayage Investment
✨ Highlights Investment
*Prices vary based on hair length, thickness, and starting color. Free consultations available at all locations.
Real Client Results
See examples of both techniques on our gallery page featuring real transformations from our Henderson and Summerlin salons. You can filter by technique to see which look you prefer!
Ready to Transform Your Hair?
Book a free color consultation at our Henderson or Summerlin salon. Our expert colorists will assess your hair, discuss your lifestyle, and recommend the perfect technique for you. We'll even show you photos of previous clients with similar hair to yours!
Frequently Asked Questions
Can I get balayage if I have dark hair?
Absolutely! Balayage works beautifully on dark hair. Our Henderson and Summerlin colorists create subtle caramel or honey tones that look incredibly natural. For maximum lift on very dark hair, we might recommend a foilayage hybrid.
Will highlights damage my hair more than balayage?
Both techniques use lightener, so damage potential is similar. However, foil highlights can lift hair lighter in one session, which may be more stressful on hair. Our colorists use bond-building treatments with both methods to protect your hair.
Can I switch from highlights to balayage?
Yes! Many of our Las Vegas clients transition from highlights to balayage for lower maintenance. We can gradually blend your highlights into a balayage pattern, making the transition seamless. It typically takes 1-2 appointments.
How does Las Vegas hard water affect my color?
Vegas hard water contains minerals that can dull both balayage and highlights over time. Use a clarifying shampoo weekly and consider a shower filter. Our salons offer chelating treatments to remove mineral buildup.
Which is better for gray coverage?
Traditional highlights typically provide better gray coverage, especially if you have significant gray. However, balayage can work for scattered grays. We'll assess your specific situation during your consultation.
How do I maintain my balayage or highlights in Las Vegas?
Use color-safe shampoo and conditioner, apply UV protection spray before outdoor activities, and install a shower filter to combat hard water. Get professional toning every 4-6 weeks at our Henderson or Summerlin salon. Read our complete hair color maintenance guide for Nevada climate tips.
Can baby lights work as an alternative to balayage or highlights?
Yes! Baby lights are ultra-fine highlights that create a subtle, natural look - perfect for low-maintenance color in Las Vegas. They're ideal if you want dimension without the commitment of full balayage or highlights. Our colorists can show you examples during your consultation.
Additional Resources
- Hair Color Maintenance: Keep Your Color Vibrant Longer in Las Vegas - Protect your balayage or highlights from Nevada's harsh climate
- Maintaining Blonde Hair in Nevada: Summerlin Salon Tips - Keep blonde highlights vibrant in Las Vegas' hard water and UV exposure
- Baby Lights: Latest Vegas Hair Trend Explained - Ultra-fine highlights for natural, low-maintenance color
- Color Correction in Henderson: What to Expect - Fix bad balayage or highlights from other salons
Expert Balayage & Highlights in Las Vegas
Our master colorists at Henderson and Summerlin have decades of combined experience creating beautiful balayage and highlight transformations in Las Vegas' unique climate. We understand how Nevada sun affects color and how to maintain it.
Call or Text: (702) 979-4468
Visiting Vegas?
See same-day extensions, color, and cut — the full salon experience before you fly home.
Related Articles
Continue reading about color

Choosing between ombre and balayage? This comprehensive comparison covers techniques, maintenance, cost, and which works best for Nevada's desert climate from our Henderson and Summerlin colorists.
The right hair color doesn't follow trends — it follows your skin tone. This guide teaches you how to identify your undertones and choose a shade that makes you glow, with Las Vegas-specific color advice.

A full 9-step walkthrough of what happens from the moment you sit in the chair to the moment you leave — consultation, sectioning, hand-painting, open-air processing, shampoo, toning, conditioning, cut, and style. Written by a Las Vegas colorist with 20 years behind the chair.