First-Time Hair Extensions: What to Really Expect (Consultation to First Month)
Nervous about getting extensions for the first time? This guide walks you through every step — from consultation to installation day to your first month — so you know exactly what to expect.
Thinking about hair extensions but not sure what you're getting into? You're not alone. Most of our first-time clients at Henderson, Summerlin, and South Summerlin walk in with a mix of excitement and anxiety — and walk out wondering why they didn't do this sooner. This guide covers every step from your first consultation to your first month with extensions, so you know exactly what to expect.
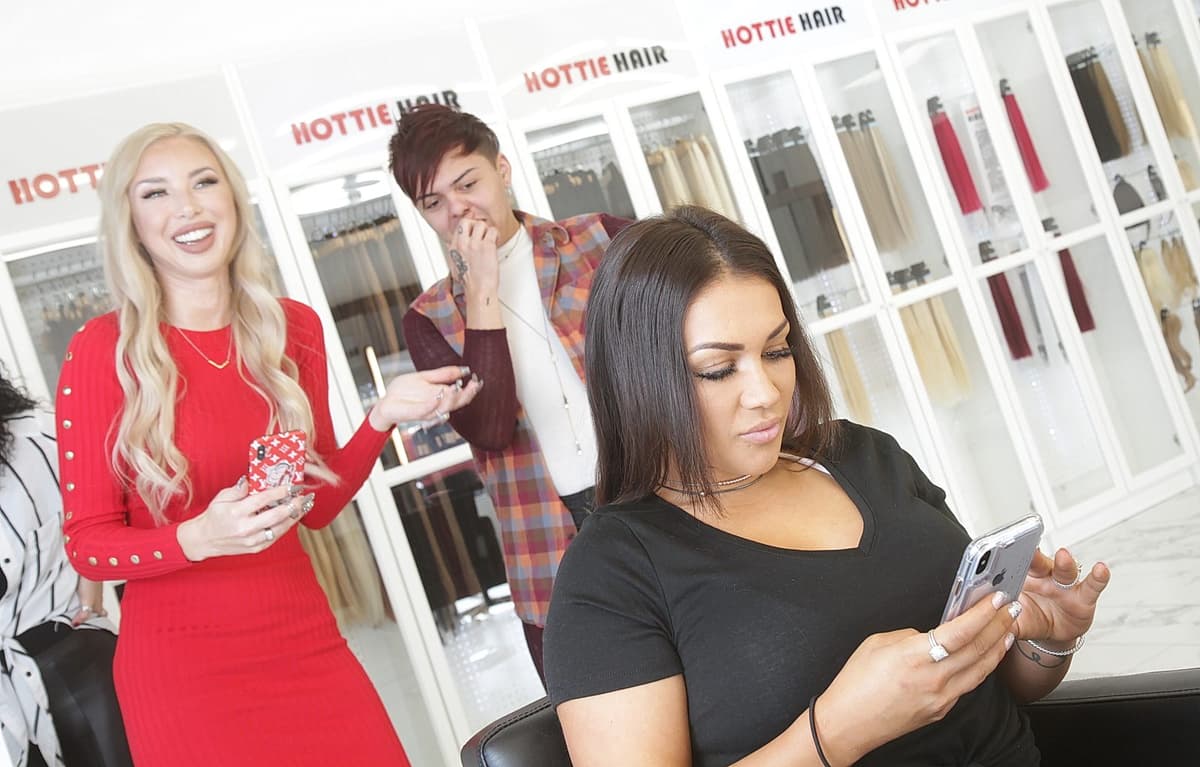
At Hottie Hair Extensions, we install extensions every single day across three Las Vegas Valley locations. We keep over $100,000 of premium human hair in stock at all times — not in a warehouse somewhere, but right here where you can see it, touch it, and hold it against your own hair before committing to anything. This guide comes from thousands of first-time installations and the real questions our clients ask. If you've been Googling "do extensions hurt?" at 2 AM, this is for you.
What's in This Guide
- It's Normal to Be Nervous (And Why Extensions Are Worth It)
- Your Free Consultation: What Actually Happens
- Choosing Your Extension Method
- Installation Day: What to Expect
- The First 48 Hours
- Your First Week with Extensions
- Your First Month: Settling In
- Common First-Timer Fears Debunked
- Las Vegas-Specific Considerations
- Cost Expectations & Maintenance Timeline
It's Normal to Be Nervous (And Why Extensions Are Worth It)
Let's start with the thing nobody says out loud: getting extensions for the first time is a little scary. You're trusting someone to change something deeply personal — your hair. You've probably spent hours on Instagram and TikTok watching transformation videos, reading horror stories about bad installations, and wondering if this is really for you.
Here's what we tell every nervous first-timer who sits in our chair: every single one of our extension clients felt exactly the way you feel right now. The woman with the gorgeous, full beachy waves sitting across the salon? She was terrified before her first appointment too.
What Our First-Timers Say Most Often
"I can't believe I waited so long." We hear this at least five times a week. The anticipation is always worse than the reality. Extensions, when done right, are one of the most confidence-boosting beauty investments you can make.
Extensions aren't just about length — though that's a big part of it. For many of our clients, it's about volume they haven't had in years, covering thinning areas they've been self-conscious about, or finally achieving the hairstyle they've wanted but their natural hair can't quite pull off. Whether you want mermaid-length hair for a Las Vegas event or simply want your ponytail to feel fuller, there's an extension method that fits.

Every extension journey starts with a relaxed, no-pressure consultation at one of our three Las Vegas locations.
Your Free Consultation: What Actually Happens
The consultation is the most important step — and also the least intimidating one. Think of it less like an appointment and more like a conversation. You're not committing to anything. You're gathering information, getting expert advice, and seeing the hair in person. Here's exactly how it goes at Hottie Hair.
How Long It Takes
Plan for about 30-45 minutes. Some consultations are quicker if you already know what you want; others take longer if we're color matching or discussing multiple options. There's no rush. We want you to leave feeling completely confident in your plan — or completely comfortable saying "let me think about it."
What Your Stylist Assesses
Your extension specialist will evaluate several things during the consultation. This isn't a test — it's how we determine which method and amount of hair will give you the best result:
- Hair texture and density — Fine, medium, or thick? This determines which attachment method works best and how many wefts or bonds you need
- Hair health and condition — We'll check for damage, breakage, or chemical processing that might affect the installation
- Natural color and tone — We color-match extensions to your hair (or your desired color). This is where seeing hair in person beats ordering online every time
- Scalp health — Healthy scalp = healthy installation. We'll note any sensitivities
- Lifestyle and maintenance capacity — How much time can you realistically spend on your hair? This affects which method we recommend
- Growth patterns and hairline — Where we place extensions matters for a natural look, especially around the face and part line

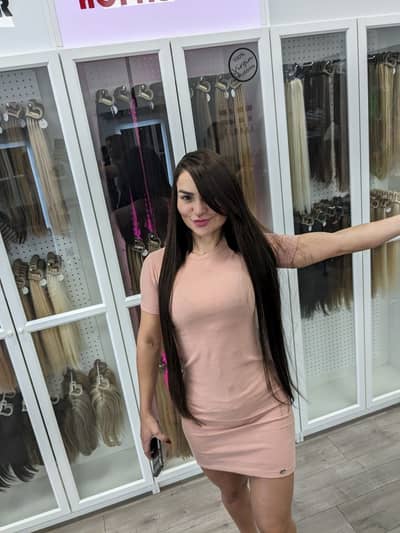
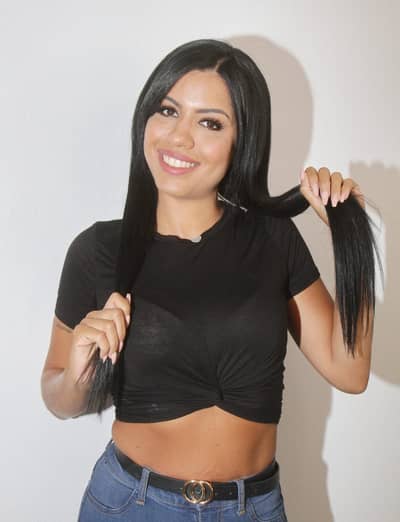
During your consultation, you'll see and touch the actual hair that would be used — no guessing based on online photos.
What to Bring to Your Consultation
- Inspiration photos — Screenshots of the length, volume, or style you want (Pinterest and Instagram are great for this)
- Your normal hair — Come with your hair how you usually wear it. Don't do anything special. We need to see the real starting point
- Questions — Write them down. You'll forget in the moment otherwise. We've listed great ones to ask below
- An open mind — You might come in wanting tape-ins and leave learning that hand-tied wefts are actually better for your hair type
Questions to Ask Your Stylist
About Your Hair
- Which method do you recommend for my hair type?
- How many wefts/bonds will I need?
- Will I need any color work before installation?
- Is my hair healthy enough for extensions right now?
About Maintenance
- How often will I need move-up appointments?
- What products should I buy before installation day?
- Can I color/heat-style with extensions in?
- What's the total cost including maintenance?
One of the biggest advantages of coming into Hottie Hair for your consultation is our in-salon inventory. Unlike salons that order hair after your consultation and make you wait weeks, we have over $100K of premium human hair on hand. You can hold different textures, compare colors against your natural hair, and see exactly what you're getting. No surprises. For a deeper look at the different methods, check our complete guide to choosing the right extension method.
Ready to See What's Possible?
Your free consultation is zero commitment and zero pressure. Come see our hair, meet your stylist, and get a personalized plan for your dream look.
Book Free Consultation or call (702) 979-4468
Choosing Your Extension Method: A First-Timer's Overview
This is where most first-timers get overwhelmed. There are several extension methods, and they all sound good online. The truth is, the best method depends entirely on your hair, your lifestyle, and your goals. Here's an honest breakdown of each method from the perspective of someone who's brand new to extensions.
Tape-In Extensions
Tape-in extensions are thin wefts of hair with a medical-grade adhesive strip. They're sandwiched around small sections of your natural hair. They're one of the most popular choices for first-timers because installation is relatively quick and they're gentle on fine hair.
- Installation time: 1-2 hours
- Maintenance cycle: Every 6-8 weeks
- Best for: Fine to medium hair, first-timers who want a low-commitment introduction to extensions
- Considerations: You need to avoid oil-based products near the bonds. Placement around the part line requires an experienced stylist for a natural look
K-Tip (Keratin Bond) Extensions
K-tip extensions are individual strands bonded to your natural hair using a keratin-based adhesive and heat. They offer the most natural movement because each bond moves independently.
- Installation time: 3-5 hours (they're placed one strand at a time)
- Maintenance cycle: Every 3-4 months
- Best for: Anyone who wants the most natural look and feel, especially those with medium to thick hair
- Considerations: Longer installation time, but longer wear time too. Individual bonds are virtually undetectable
I-Tip (Micro-Link) Extensions
I-tip extensions use individual strands secured with tiny silicone-lined beads — no heat, no glue. The bead is clamped around your natural hair and the extension strand.
- Installation time: 3-5 hours
- Maintenance cycle: Every 2-3 months
- Best for: Clients who prefer a no-heat, no-adhesive method. Great for those with sensitivities
- Considerations: Requires diligent brushing to prevent tangling around the beads. Excellent for clients who work out frequently
Hand-Tied Weft Extensions
Hand-tied weft extensions are ultra-thin, hand-sewn wefts attached to a beaded row sewn into your natural hair. They lie extremely flat against the head and distribute weight evenly.
- Installation time: 2-3 hours
- Maintenance cycle: Every 6-8 weeks
- Best for: Fine to medium hair where maximum volume is the goal. The flat profile means they're virtually undetectable, even in updos
- Considerations: Requires an experienced stylist for proper beaded row placement. Limited styling versatility at the top row
Beaded Weft Extensions
Beaded weft extensions (also called bead and sew) combine a beaded row foundation with machine or hand-tied wefts sewn onto the row. They offer excellent volume and are known for being comfortable and secure.
- Installation time: 2-3 hours
- Maintenance cycle: Every 6-8 weeks
- Best for: Medium to thick hair. Clients who want dramatic volume and length
- Considerations: The weft distributes weight across the entire row, reducing stress on any single point. Very comfortable for daily wear
Our First-Timer Recommendation
For most first-time clients, we recommend tape-ins or hand-tied wefts. Tape-ins are the gentlest introduction — quick to install, easy to maintain, and lower initial investment so you can see if extensions are right for you. Hand-tied wefts are ideal if you already know you want maximum volume and are ready to commit. During your consultation, your stylist will make a personalized recommendation based on your specific hair. Want a deeper comparison? Read our full extension method comparison guide.
Installation Day: What to Expect
Installation day is the exciting part. You've had your consultation, chosen your method, and your hair is color-matched and ready to go. Here's what the day looks like.
Before You Arrive
- Wash your hair the night before — Clean hair helps bonds and adhesives grip properly. Skip conditioner on the roots if you're getting tape-ins
- Wear a button-down top — You'll thank us. Pulling a shirt over your head right after installation is awkward and can snag fresh bonds
- Eat before you come — Depending on your method, you could be in the chair for 2-5 hours. Bring snacks and a water bottle
- Bring entertainment — Your phone, a book, headphones. Our stylists love to chat, but some clients prefer to relax quietly during the process
- Clear your schedule — Don't plan anything high-energy for the rest of the day. You'll want time to admire your new hair (trust us)
Installation Time by Method
| Method | Typical Time | What's Happening |
|---|---|---|
| Tape-Ins | 1-2 hours | Adhesive wefts sandwiched around natural hair sections |
| K-Tip | 3-5 hours | Individual strand-by-strand keratin bonding |
| I-Tip | 3-5 hours | Micro-beads clamped around individual strands |
| Hand-Tied Weft | 2-3 hours | Beaded rows installed, wefts sewn onto rows |
| Beaded Weft | 2-3 hours | Bead-and-sew method with weft attachment |
Does It Hurt?
This is the number one question we get, and the honest answer is: no, but you'll feel it. Installation itself is not painful. You might feel some gentle tugging and pulling as your stylist sections your hair and attaches the extensions. With tape-ins and weft methods, most clients describe it as a slight pressure. With K-tips and I-tips (individual strand methods), the process is so fine that many clients fall asleep in the chair.
Where you might feel mild sensitivity is in the first day or two after installation. Your scalp isn't used to the added weight, and the attachment points may feel slightly tight. This is completely normal and usually resolves within 48 hours. We'll cover this in detail in the next section.

Installation in progress — our experienced stylists work carefully and efficiently to minimize any discomfort.
The Reveal Moment
We won't lie — this is our favorite part of the job. When we spin that chair around and you see yourself for the first time with extensions, the reaction is almost always the same: hands fly up to the mouth, eyes go wide, and there might be tears (the good kind). The transformation from flat, thin, or shoulder-length hair to full, voluminous, flowing hair is genuinely dramatic. Many clients tell us it's the first time they've felt truly confident about their hair in years.

The reveal moment — the best part of every installation day.
Real First-Time Extension Transformation

Before

After — by Niko Hernandez
A bead & sew extension installation — adding incredible length and volume. See more in our transformation gallery.
See the Difference in Person
Photos are great, but nothing compares to seeing and touching real extension hair. Book a free consultation at our Henderson, Summerlin, or South Summerlin location and experience our $100K+ inventory firsthand.
Book Free Consultation or call (702) 979-4468
The First 48 Hours: Your Adjustment Period
The first two days after installation are an adjustment period. Your scalp is getting used to the added weight, your fingers keep finding attachment points, and you're suddenly hyper-aware of every sensation on your head. All of this is completely normal.
What's Normal in the First 48 Hours
- Mild scalp tenderness — Especially at the attachment points. Think of it like the feeling after wearing a tight ponytail all day. It should be mild, not painful
- Hyper-awareness — You'll notice the extensions constantly at first. This fades within a few days as your brain adjusts
- Sleeping differently — Your first night will feel weird. Your head feels heavier on the pillow. This is temporary
- Excitement overload — You'll probably touch your hair constantly and check every mirror you pass. This is expected and encouraged
Sleeping with Extensions
Sleeping with extensions for the first time is the thing that catches most people off guard. Here's how to handle it from night one:
- Braid loosely before bed — A loose, low braid or two loose braids prevent tangling overnight. This is the single most important habit to develop
- Silk or satin pillowcase — Non-negotiable. Cotton pillowcases create friction that causes matting and tangling. A silk pillowcase is a $20 investment that protects your multi-hundred-dollar extensions
- Don't sleep with wet hair — Wet extensions tangle dramatically overnight. Always dry your hair fully before bed
- Sleep on your back or side — Avoid sleeping face-down directly on attachment points
Washing Rules for the First 48 Hours
The 48-Hour Rule
Do not wash your hair for at least 48 hours after installation. For tape-in extensions, this is critical — the adhesive needs time to fully cure. For weft and bonded methods, the 48-hour wait allows your scalp to settle and attachment points to stabilize. Your stylist will tell you the exact timeline for your method.
Your First Week with Extensions
By day 3-4, the initial tenderness has faded and you're starting to get comfortable. This first week is about building good habits that will keep your extensions looking amazing for their entire wear cycle.
Brushing: The Most Important Habit
Brushing extensions is different from brushing natural hair. You need a loop brush or extension-safe detangling brush (your stylist will recommend one at installation). Here's the technique:
- Start at the ends — Hold the hair at mid-shaft and gently brush from the bottom up, working through tangles
- Work up gradually — Once the ends are smooth, move higher. Never start at the roots and rip downward
- Be gentle at attachment points — Brush around bonds, beads, and tape tabs — not through them
- Brush 2-3 times daily — Morning, evening, and after any physical activity. This prevents micro-tangles from becoming matted knots

The right tools make all the difference — an extension-safe brush is your most important purchase alongside your extensions.
Washing During Week One
After the initial 48-hour waiting period, you can wash — but with some important modifications:
- Use sulfate-free shampoo — Sulfates strip moisture and can weaken adhesive bonds. Your stylist will recommend specific products
- Wash in a downward motion — No scrunching, no piling hair on top of your head. Let water flow down naturally
- Condition mid-length to ends only — Keep conditioner away from roots and attachment points
- Wash 2-3 times per week max — Over-washing is the fastest way to shorten extension life, especially in Las Vegas's dry climate
- Dry thoroughly — Never go to bed with damp extensions. Blow-dry on medium heat, focusing on the roots and attachment areas
For a complete wash-day routine, read our tape-in extension care guide — much of the washing advice applies to all methods.
What's Normal vs. What's Not
Completely Normal
- A few shed hairs during brushing (your natural hair sheds 50-100 strands daily — they get caught in extensions instead of falling out)
- Itchiness at attachment points as your scalp adjusts
- Feeling like your hair is "heavy" (it is — you'll stop noticing within a week)
- Extensions feeling slightly stiff at first — they soften after the first wash
Call Your Stylist
- Persistent pain (not mild tenderness) after 3+ days
- Visible matting that brushing can't resolve
- Extensions sliding or slipping out
- Scalp irritation, redness, or bumps at attachment points
- A bond or tape tab that feels noticeably loose
If anything doesn't feel right, don't wait — call us at (702) 979-4468 or check our extension troubleshooting guide. Small issues caught early are easy to fix. Ignored problems become expensive ones.
Your First Month: Settling In
By weeks 2-4, something magical happens: you forget the extensions are even there. Your brain has fully adjusted to the added weight, your daily routine has accommodated the new brushing and washing habits, and you're simply living your life with incredible hair. Here's what to focus on during this settling-in period.
Products You Need
Your stylist will give you a personalized product list during installation, but here are the essentials every extension client should have at home:
- Sulfate-free shampoo and conditioner — This is non-negotiable. Regular shampoo will strip your extensions and weaken bonds
- Extension-safe brush — A loop brush or wet brush designed for extensions. Regular brushes rip through bonds
- Leave-in conditioner or detangling spray — Use daily on the mid-lengths and ends to prevent tangles
- Heat protectant — If you use hot tools (and most people do), always protect extensions from heat damage. Extensions can't repair themselves the way natural hair can
- Silk or satin pillowcase — Or a silk hair wrap. Friction from cotton causes matting
- Hair oil or serum — For the ends only. Keeps extensions soft and shiny, especially in Nevada's dry air
When to Call Your Stylist
During your first month, don't hesitate to call if:
- Any bonds or tape tabs come loose or shift significantly
- You notice more shedding than the first week
- Tangling becomes unmanageable despite proper brushing
- You're unsure about a product, tool, or styling technique
- You have an event coming up and want a styling refresher
Think of your stylist as your extension partner, not just your installer. We want you to reach out with questions — that's how we ensure your extensions last their full life cycle and your hair stays healthy underneath.
Activities to Be Careful With
Generally Fine (With Precautions)
- Gym workouts — braid first, wash after
- Yoga and Pilates — braid or clip up loosely
- Dancing or nightlife — the extensions thrive here
- Light swimming — wet and condition before pool, rinse immediately after
Use Extra Caution
- Heavy pool/hot tub use — chlorine is harsh on bonds. Use a swim cap or leave-in protectant
- Sauna or steam room — heat can soften keratin bonds and tape adhesive
- Ocean swimming — salt water tangles extensions aggressively
- Extreme sports — anything that involves helmets rubbing on attachment areas
Real Keratin Extension Transformation

Before

After — by Niko Hernandez
Full blonding with keratin bond extensions for dramatic length and volume.

This is the energy at week three — you've got the routine down, the hair looks incredible, and you can't stop flipping it.
Nervous? Let's Talk It Through
The best cure for extension anxiety is talking to someone who does this every day. Our stylists have answered every question you can think of — and probably a few you haven't thought of yet.
Book Free Consultation Mon-Sat 10AM-7PM
Common First-Timer Fears, Honestly Debunked
We've heard every worry in the book. Here are the most common fears and our honest, no-BS answers from years of extension experience in Las Vegas.
"Will People Notice They're Extensions?"
When installed by an experienced stylist using quality hair — no. The whole point of professional extensions is that they look like your natural hair, just better. The color is matched to your exact shade, the attachment points are hidden within your natural layers, and the blending cut after installation ensures seamless integration. People will notice your hair looks amazing. They will not notice extensions unless you tell them. Many of our clients report that friends and coworkers simply compliment their "great hair day" without ever suspecting extensions.
This is also why a proper consultation matters so much — and why going to an extension specialist rather than a general stylist makes all the difference. Check out our transformation gallery to see how natural our installations look.
"Will Extensions Damage My Natural Hair?"
This is the biggest fear, and the answer requires nuance. Properly installed and maintained extensions should not cause damage to healthy hair. The key words there are "properly" and "healthy." Damage happens when:
- Extensions are installed too tightly or in the wrong placement
- Move-up appointments are skipped or delayed too long
- Attachment points aren't brushed properly, causing matting at the root
- Extensions are installed on already-damaged or extremely fine hair that can't support the weight
At Hottie Hair, we assess your hair's health during the consultation specifically to prevent these issues. If your hair needs strengthening before extensions, we'll tell you honestly and may recommend a treatment plan first. We'd rather delay an installation than compromise your hair health.
"Can I Still Work Out?"
Absolutely. We have clients who are competitive athletes, daily gym-goers, and yoga instructors. The keys are: braid your hair before working out to prevent sweat-related tangling, and wash with a clarifying rinse after particularly sweaty sessions. If you work out 5+ days a week, your stylist might recommend I-tip or beaded weft extensions, which handle frequent washing better than tape-ins.
"Can I Swim with Extensions?"
Yes — but with precautions. This is especially relevant in Las Vegas, where pool parties and resort pools are a way of life. Before swimming, wet your hair and apply a leave-in conditioner to create a barrier. After swimming, rinse with fresh water immediately and deep condition that evening. Avoid submerging your head if possible (we know, easier said than done at a Vegas pool party). Chlorine is harder on extensions than salt water, so pool swimmers should invest in a good chelating shampoo. Read our hard water and mineral buildup guide for product recommendations.
"What If I Don't Like Them?"
First: this is extremely rare when the consultation and color matching are done well. But it's a valid concern. Here's the reality — extensions can be removed at any time. Tape-ins release with a solvent in under an hour. Keratin bonds are dissolved with a removal solution. Weft rows are unstitched and beads opened. There is no permanence to extensions. If you genuinely don't love them (which, again, almost never happens), they come out with no lasting effects.
More commonly, what happens is that a client wants a minor adjustment — slightly different placement, a different blending cut, or a color tweak. These are all simple fixes that your stylist handles during a quick revisit. This is another reason we recommend starting with a method like tape-ins: lower investment, shorter installation, and easier to adjust if needed.
Las Vegas-Specific Considerations for New Extension Clients
Living in the Las Vegas Valley means your extensions face environmental challenges that clients in other cities don't deal with. Here's what to know from day one.
Hard Water: Your Extensions' Biggest Enemy
Las Vegas has some of the hardest water in the United States — 278–397 mg/L of dissolved minerals per SNWA, well into the USGS "very hard" classification. These minerals (primarily calcium and magnesium) deposit onto your extension hair with every wash, causing:
- Dull, lifeless appearance despite regular conditioning
- Rough, straw-like texture that worsens over time
- Brassy discoloration on blonde and light-colored extensions
- Weakened tape adhesive and compromised keratin bonds
- Product buildup that doesn't wash out with regular shampoo
Our recommendation: Install a shower filter before your extensions go in. A $30-40 shower filter is the cheapest insurance policy for your extension investment. We also recommend a chelating or clarifying shampoo once every 2-3 weeks to dissolve mineral buildup. Read our full Las Vegas hard water solutions guide for specific product and filter recommendations.
Desert Sun and UV Protection
Las Vegas gets over 300 sunny days per year, and UV radiation fades extension color faster than you'd expect. Extensions can't regenerate melanin the way your natural hair does, so UV damage is permanent until your next set. Wear a hat when you'll be in direct sun for extended periods, use a UV-protectant spray, and avoid leaving your hair down and exposed during peak sun hours if you can help it. For more on protecting your hair from our climate, check out our guide on protecting hair from Nevada's heat and dryness.
Pool and Resort Season
If you live in Las Vegas, you're going to be around pools. Period. Between backyard pools, resort day clubs, and hotel pools, water exposure is inevitable from April through October. Here's how to handle it:
- Pre-soak with fresh water — Saturating your hair with clean water before getting in the pool means it absorbs less chlorinated water
- Apply a leave-in conditioner or coconut oil — Creates a hydrophobic barrier against chlorine and minerals
- Rinse immediately after swimming — Don't let chlorinated water sit in your hair. Rinse within minutes of getting out
- Use a swim cap for extended pool time — Yes, really. If you're doing laps or spending hours in the water, a cap saves your extensions
- Deep condition the same day — Every pool day should end with a deep conditioning treatment on the mid-lengths and ends
Why Local Expertise Matters
A stylist in Portland doesn't deal with the same challenges as a stylist in Las Vegas. Our dry air (often under 15% humidity), extreme hard water, intense UV, and pool culture mean your extensions need a maintenance plan calibrated for this specific environment. That's why going to a salon that specializes in extensions and operates in the Las Vegas Valley is so important. We've refined our techniques, product recommendations, and maintenance schedules specifically for Nevada conditions over thousands of installations.
Cost Expectations & Maintenance Timeline
Let's talk money. Extensions are an investment, and you should go in with clear expectations about both the initial cost and ongoing maintenance. For a detailed cost breakdown by method, visit our complete hair extension pricing guide.
Initial Installation Costs
Extension pricing varies based on the method, the amount of hair needed, and any color services required before installation. Here's a general range for Las Vegas:
| Method | Typical Range | Includes |
|---|---|---|
| Tape-In | $600 - $1,200+ | Hair + installation + blending cut |
| K-Tip / I-Tip | $800 - $2,000+ | Individual strands + application + custom blend |
| Hand-Tied Weft | $800 - $1,800+ | Wefts + beaded row install + blending cut |
| Beaded Weft | $800 - $1,800+ | Wefts + bead-and-sew install + blending cut |
These ranges depend on how many rows or bonds you need (determined at your consultation), the length desired, and whether you need color work before installation. At Hottie Hair, we give you an exact quote during your consultation — no surprises on installation day.
Ongoing Maintenance Costs
Extensions aren't a one-time purchase. Here's the ongoing investment to plan for:
- Move-up appointments (every 6-8 weeks for tape/weft; every 3-4 months for K-tip/I-tip) — This is when your stylist adjusts the extensions as your natural hair grows. Typically $150-$400 depending on method
- New hair (every 6-12 months depending on method) — The original hair wears out over time and needs replacement. Budget for a partial or full reinstall
- Maintenance products — Sulfate-free shampoo, conditioner, detangling spray, brush. About $50-80 every 2-3 months
- Optional: color touch-ups — If your root growth creates a visible line, color blending keeps things seamless
Your First-Year Maintenance Timeline
| When | What Happens |
|---|---|
| Day 1 | Initial installation + blending cut + aftercare education |
| Week 1-2 | Adjustment period — establish brushing and washing routine |
| Week 6-8 | First move-up appointment (tape/weft) — extensions repositioned higher as hair grows |
| Month 3-4 | Second move-up (tape/weft) or first move-up (K-tip/I-tip). Hair may be reused |
| Month 6 | Third move-up (tape/weft). Tape-in hair may need replacing. Bond extensions still going strong |
| Month 9-12 | Full reinstall with fresh hair for most methods. You're now an extension pro |
Cost-Saving Tip for First-Timers
If budget is a concern, start with tape-in extensions. They have the lowest upfront cost, the quickest installation, and give you a real feel for extension life before committing to a higher-investment method like K-tips. Many of our clients start with tape-ins and later upgrade to their "forever method" once they're hooked.
Frequently Asked Questions
How old do I need to be to get extensions?
We install extensions on clients 16 and older (minors need parent/guardian consent). There's no upper age limit — we have clients in their 60s and 70s who love their extensions for adding volume to thinning hair.
Can I get extensions if my hair is very short?
Your natural hair needs to be at least 4-6 inches long (roughly chin-length) for most methods. If your hair is shorter, we can discuss options during your consultation — some methods work with shorter hair than others.
Can I color my extensions?
Human hair extensions can be toned and darkened, but lightening extensions is not recommended as it can compromise the hair quality. It's best to get your extensions color-matched at the consultation so they blend perfectly from the start.
Will extensions give me headaches?
Mild tension headaches can happen in the first 24-48 hours, especially if you're not used to the weight. This is temporary. If you experience persistent headaches beyond 3 days, contact your stylist — the extensions may need slight adjustment.
How do extensions look when my hair is up?
With proper placement, you can wear ponytails, buns, half-up styles, and braids without attachment points showing. Your stylist strategically places extensions to allow for versatile styling. Higher placement near the crown is specifically designed for updo flexibility.
Do I need to come to all three locations?
No — pick whichever of our three Las Vegas Valley locations is most convenient for you: Henderson, Summerlin (West Charleston), or South Summerlin (Durango). Your consultation, installation, and all maintenance can happen at the same location.
Ready for Your Extension Journey?
Every transformation starts with a free consultation. Come see and touch our $100K+ inventory, discuss your goals with an extension specialist, and leave with a personalized plan. No commitment, no pressure — just expert advice.
(702) 979-4468 | Mon-Sat 10AM-7PM
Continue Your Extension Education
- Choosing the Right Hair Extension Method — Deep-dive comparison of all methods
- Hair Extension Cost & Pricing Guide — Detailed breakdown of what extensions really cost
- Tape-In Extension Care Guide — Complete maintenance protocol for tape-ins
- Hair Extension Troubleshooting — Solutions for common extension issues
- Protecting Hair from Nevada Heat & Dryness — Las Vegas-specific hair protection
- Las Vegas Hard Water Solutions — Fight mineral buildup that damages extensions
Visiting Vegas?
See same-day extensions, color, and cut — the full salon experience before you fly home.
Related Articles
Continue reading about extensions

Learn why professional extension removal matters and what to expect during your appointment. Complete guide to safe removal, aftercare, and reapplication timing from our Henderson and Summerlin specialists.
See every step of a 30-inch hand-tied weft extension installation — from consultation to final reveal. Real salon photos showing what to expect at your appointment in Las Vegas.
Follow a complete beaded weft extension appointment at our Las Vegas salon — from shampoo prep and beading to the dramatic before-and-after reveal. Real photos, real client.